Sunday, September 6, 2015

The New Fighter Primer

I plan for this post to be an annual thing I post during recruitment season.  I'll try to keep it up to date with anything I miss or questions that seem to always come up.

Welcome to Numenor, new fighters! I've been compiling a FAQ of sorts for new fighters.  If you have a question that I've missed here, or an answer doesn't quite hit the nail on the head, let me know.  There is also a list of handy links at the bottom for a variety of sword fighting related topics.

Q: How do I join the club?
A: If you've joined the Facebook group, that's about it.  Show up and hit people during the scheduled practice times.  We'll have extra gear to loan out.  We do have a mailing list you can sign up for, but most of the info you'll want will be posted on the Facebook page. Come and go as you please, and stay as long as you like.

Q: Do I need to bring anything?
A: We have plenty of gear for you to use, but a few essentials like kneepads or padded gloves are a great investments.  Most sporting good stores sell both items.  Many of us use volleyball kneepads and padded lifting or MMA gloves.  As always, bringing water and wearing clothes you don't mind dirtying up is probably a good idea.  Bring your friends, they are even more fun to hit with foam covered sticks.

Q: I have a question or problem, who should I talk to?
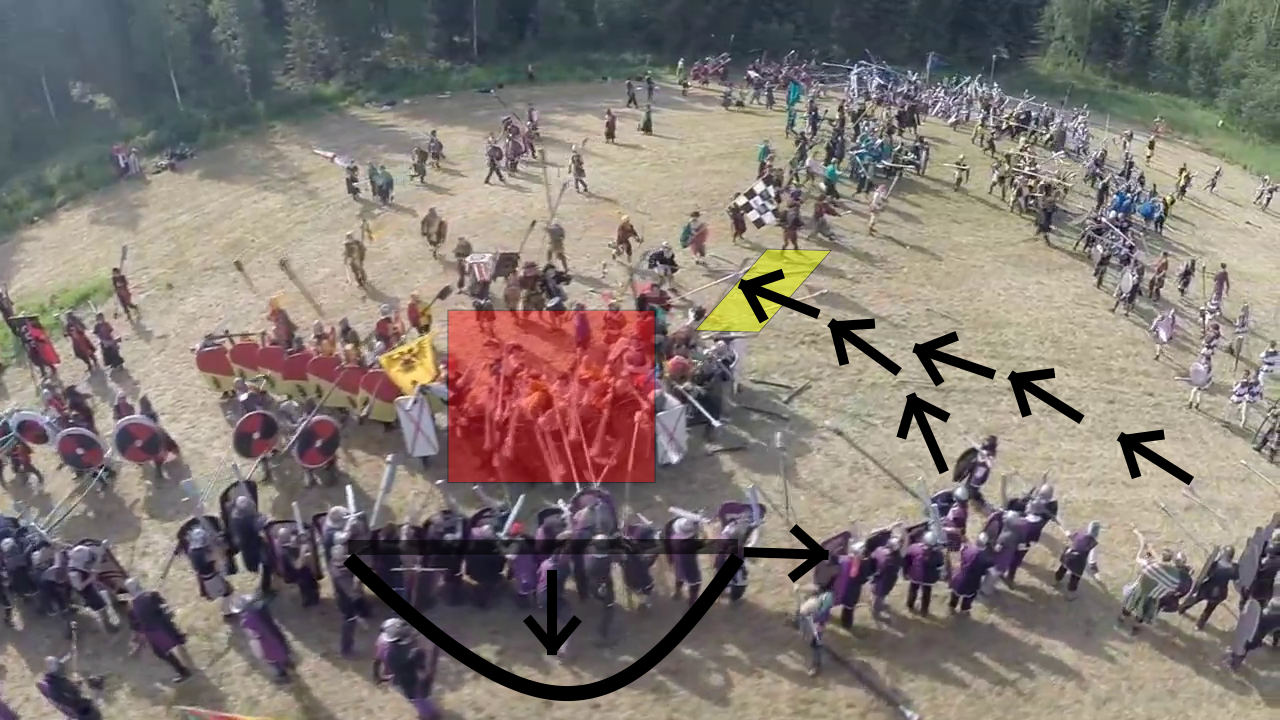
A: The local realm has a great group of veteran fighters that can help you out.  Knights (the ones with the fancy garb and heater shield that's shaped like home base) take charge of the local group and have lots of experience with fighting.  Don't be intimidated by all the armor or angry face on the field, we're here to help.  Our squires (knights in training) all are seasoned fighters and usually wear a white tabard.  Any of them should be able to help you out, or direct you to one of us knights if they aren't sure.

At bigger events or other groups, the first stop should be finding a herald (the ones with a yellow tabard).  They are the game's version of a referee and can help you figure out rules problems or point you in the direction of someone who can help you.  If you see anything unsafe on the field, bring it to their attention immediately.

Q: The rules seemed a little too simple, is there anything else I should know?
A: We use the simplest, abbreviated version of the rules for events like Quad Day, so you can come out and get into the fighting quickly.  The full version of the rules can be found on the Belegarth Wiki page, http://www.geddon.org/Book_of_war.  It isn't an easy read, I'll put together a more comprehensive list of common rules questions this week. Also, take a peek at this blog post that explains a few things that aren't in the rulebook.

Q: Should I buy/build my own gear?
A: Eventually, yes.  Use a variety of loaner gear and talk to veterans to get a feel for what your options are before you buy.  Luckily, the guys from Forged Foam usually offer a steep discount to new fighters and bring some gear to practice to sell.  Their usual prices for new people make buying a sword about as cheap as making it yourself.

Building your own is something you can consider.  However, I highly recommend having a veteran help you rather than following some of the online tutorials available.  Many are outdated and recommend materials that may not be as optimal compared to other options.  Forged Foam, and other vendors, do generally sell materials that are better than some of the off-the-shelf options, and at a reasonable price.

Q: Can new fighters use polearms/red weapons/bows?
A: We usually prefer that new fighters wait to pick up more than one handed swords and shields.  Many other weapons add a degree of danger to other fighters, and we'd like to get you some training on the more dangerous weapons before we send you out of the field with them.  Safety is our number one priority.  If you are interested in learning/practicing more advanced weapons, talk to one of us that you see using them at practice.  We'll do some one on one training and then help you get ready to use them on the field.

Q: What is a realm, unit?
A: Realms are geographic locations within the sport.  UIUC is the Realm of Numenor.  ISU has one called Wolfpack just 45 minutes from town.  There are realms spread out all across the country (and internationally), but not all are connected to universities or colleges.  Units are groups of fighters that train, fight, and hang out together. Local units include the Dunedain and Dark Guard.  Some units, like Brotherhood of the Falcon (BOF) and the Urak-hai span the nation, grouping up at major events. If you are interested in joining a unit, ask around and get a feel for each one.  If you can make it to Oktoberfest, it is a great place to get to know units and spend some time hanging out with them around a campfire.

Q: I keep losing, how do I get better?
A: For one, don't get discouraged.  Between learning the rules and getting your body used to swinging a sword, the game can be quite hard.  Remember, some of our veterans have a decade or more of fighting under their belts--they aren't going to be easy to kill.  We'll do more structured training this fall to get people ready for the first major event of the season.  More on that later.

Q: Do you have tournaments, rankings, levels, events?
A: There is a large number of events, some of which are major, weeklong camping events.  Sometimes they have individual and team tournaments at these events.  While there are definitely different levels of skill, there is no official ranking system or levels of combat.  This coming Saturday is our local group's first mini-event of the season.  We'll have food, games, and lots of company.  In October, our group hosts one of the largest events in the Midwest, Oktoberfest, a weeklong event with camping, feasts, tournaments and plenty of nightlife.  Imagine 500+ fighters on a field, pretty epic.

Q: Why do you guys wear that clothing/do I have to dress that way?
A: Garb isn't specifically required for fighting at practice.  The local group usually just asks that you get/wear garb before moving on to using weapons beyond basic swords and shields.  Nationally, garb is required for events.  The minimum garb is outlined in the rules, and we will definitely work with you to get geared up for the first major event.

Q: That guy is definitely cheating, what do I do?
A: There is a long rant here about this.  TL;DR: focus on doing your best to take hits you receive quickly and accurately.  If you suspect someone has missed a hit or cheated, ask them about it after the fight.  Worst case, ask a herald about it.

Q: What is Oktoberfest?
A: Oktoberfest 2015: Sept. 30 - October 4

Oktoberfest (Okfest) is one of the largest Belegarth events of the year.  I believe it was THE largest event in Belegarth for 2014 in terms of attendance.  It is a multi-day camping event with three full days of swordfighting.  Even if you can't get away for the full three days, making it to Friday and/or Saturday is definitely worth it.  Coincidentally, the local realm plans and runs this event each year, and it is only 45 minutes from town.  We'll coordinate to make sure anyone that needs a ride can get to and from the event. There is almost always a group or two heading to/from the event each day.  More details will be posted on the facebook group as the time approaches.


Here are a few other links you might want to follow:

From Oktoberfest 2013 Realm Battles (each realm for themselves): https://www.youtube.com/watch?v=wY7rVmEG0cw

From a nearby event, Wolfpack Opener, a couple years ago:
https://www.youtube.com/watch?v=7t8d5IHEZL0

www.belegarth.com This is the home of the national organization.  The forums have a large amount of information, and links to training videos and guides.

www.geddon.org The Belegarth wiki. Lots of info on units, realms, and people. It is in the process of being made a little more user friendly, but there is basic information buried on there.

http://geddon.org/Book_of_war This is the most readable version of the rulebook we use. There are a few rules that aren't clearly spelled out, but definitely a must read.  I'll post up some common rules that aren't really defined in the book later this week.

www.forgedfoam.com Locally operated foamsmith. They made a large portion of our loaner gear and personal equipment.  The guys will be around selling gear at future practices.

https://www.facebook.com/pages/Lady-Armstrong-Designs/266921383370663  Lady Armstrong is a (formerly) local seamstress that has made some of the fine looking garb you'll see around.  We don't expect new fighters to look that amazing, but it should give you an idea of how cool garb can be.

Spear Formations

Whoo, it sure is dusty in here.  Been a while since I put out a post.  So, of course, why not put out a nice, wordy bit that was supposed to be published months ago.

Last time we looked at Sotahuuto, which was a good sample of spear formations we can see on a larger fighting field.  For Belegarth, a few of these are highly ineffective, due to the limitations on one-handed stabs versus armor and the rules for sufficient force.  However, I'd like to go ahead and include those types of formations here for the sake of completeness.  Hopefully people that fight in other sports can find some value in my evaluation of those formations that don't really make sense for Belegarth.

For starters, what do I mean by "formation"?  While one spear often forms up with a shield man, this isn't necessarily a formation.  This is meant to be more of a big picture perspective, what a whole group of spears and shields working as a unit might attempt.  Learning to combat these well-organized teams of spears will make fighting against the sort of ad-hoc groupings we see on a typical Belegarth field a little easier.  Below you'll find my analysis of strengths and weaknesses of each type.  I've given each one a name of my own design, roughly based on historical terms.

Types of Spear Formations:

Ad-Hoc

The ad-hoc formation is your typical mismatched group of fighters with the occasional spear or support weapon.

Strengths:
  • Spears can operate independently and adjust position easily
  • Easy for spears to deploy after fighting starts, boosting their effectiveness
  • The line isn't dependent on the spears and can move freely
Weaknesses:
  • Less coordination between spearmen
  • Spearmen often have to rely on random shieldmen
  • Spearmen must look after their own safety, because the formation isn't geared to protect them
How to Kill It:
  • Avoid the spears and push elsewhere
  • Kill pocket--try to force individual spears into a bad position and counter them with spears from the flanks
Phalanx

A phalanx is a unit consisting of nothing but spears, preferably very long spears (15' or so).  By arranging themselves in tightly packed ranks and files, they are able to concentrate their offense.  These are exceptionally rare in Belegarth (maybe almost never), but we did see one group in the video from Sotahuuto attempt it.

Strengths:
  • Very concentrated offense
  • Long range versus most other fighters
  • Overlapping spears help defend against rushers
Weaknesses:
  • No/limited defense against missile weapons
  • Cumbersome--many people tightly packed make it difficult to maneuver
  • Manpower intensive--it takes many people to fill in the formation compared to other solutions
  • Very limited attack and defense at "point blank" range
How to Kill It:
  • With Arrows!--even blindly firing a volley will get kills
  • Out-maneuver it--the formation can't hold together well on the move or while turning
  • Flank it--use part of the group as a distraction while the rest attack from the sides/rear
  • Kill Pocket--let the spears push into the center and fold in on their flanks, this forces the spears to spread their offense as the frontage expands in the curve.
  • Overrun it--a well timed, full line charge where everyone pushes forward can succeed.  This is very risky.
  • The wedge--a small group of well armored fighters concentrate a charge up the middle.  Their goal is to force the spears to fight at point blank.  This is risky, but less so than a full overrun.

Shielded Phalanx

Like a phalanx, but with the front rank equipped with swords and shields. Still not likely to see it in Bele.

Strengths:
  • Better missile defense than a pure phalanx
  • Strong defense against rushers
Weaknesses:
  • Still cumbersome
  • Loses some offense/range from first row of spears vs. a pure phalanx
  • Shields can cut off some lanes of attack for the spears
How to Kill It:
  • Out-maneuver it--the formation can't hold together well on the move or while turning
  • Flank it--use part of the group as a distraction while the rest attack from the sides/rear
  • Kill Pocket--let the spears push into the center and fold in on their flanks, this forces the spears to spread their offense as the frontage expands in the curve.
Hoplights

Something you won't see in a Belegarth field today, an entire group of shield/spear wielding fighters.

Strengths:
  • Greater range than a sword/shield formation
  • Solid defense against missiles
  • Very maneuverable (for a spear formation)
  • Much better at closer ranges than a phalanx against unarmored foes
Weaknesses
  • Can't effectively fight armored opponents (in Bele)
  • Still has difficulty fighting at point blank
  • Outranged by longer spears/glaives
How to Kill It:
  • Tank out--shove armored fighters down their throats (in Bele)
  • Range--Use longer support weapons and fight defensively
  • Charge--They aren't good at fighting super close, get in there all together and fight them at point blank. 
Interlaced

In between every shield is a spear.  Every other person in the line is a support weapon.

Strengths:
  • Strong defense/offense mix
  • Every spear has someone to hide behind against missiles
  • More maneuverable than a shielded phalanx
  • Spears are very cooperative and have overlapping ranges
  • Efficient use of manpower to cover an area. (for a spear formation)
Weaknesses:
  • Often has uneven skill distribution--there is likely a weak spot at a spear or two
  • Relies on spears cooperating to be effective
  • Rarely has a backfield/reserves--vulnerable to minor breakthroughs
How to Kill It:
  • Vision gaps--a wavy line can cause vision gaps that allow a small group (or one fighter) to get behind the formation.
  • Wedge/Rush--a practiced fighter can rush a spear with a little support or distractions.  A group can force their way through.
  • Coordinated Missiles/Spears--a shieldman can't cover themselves and a spear from multiple angles of attack. Have archers and spears coordinate against a pair at a time.
Triples
One spear, two shieldmen. The main difference between interlaced and triples is that the triples act with much more independence than a typical line. Usually, the spear is on charge of their triple.

Strengths:

  • Strong at close range
  • Resistant to missile attack
  • Usually has most experienced fighters using the support weapon and leading the triples
  • Harder to rush against
  • Can exploit gaps and be used to flank
Weaknesses:
  • Less coordination between support weapons
  • Easier to cause gaps between triples
  • Support weapon doubling as a command element makes it a priority target for missile weapons
How to Kill It:
  • Kill Pocket--try to pull one triple into the pocket
  • Flank It--have 1-2 shieldmen engage each triple from the front, keeping the spear's attention. The rest need to maneuver around and between the triples.
  • Rush Them--assassinate the triple's commander/support weapon.  A skilled fighter can make it through the middle well enough to kill them.  Gets riskier as their shieldmen improve in skill.
  • Out Support Them--triples have less support weapons than other spear formations, if you can get a few extra spears to help out against them, it drastically reduces their effectiveness.


Tuesday, January 27, 2015

Replay: Sotahuuto 14

Ok, this is something new to me and the blog, so hopefully you find it useful.  If it seems helpful, I'll look into doing other posts in this type of fashion in the future.

A reader from Europe sent me a link to video from one of the large foam fighting events they've attended over there.  While it isn't Belegarth rules (tap fighting, head legal, and a few others), the video does illustrate a few concepts that are universal to the large scale fighting we see at events.  Please note, those are indeed 15' spears you see everywhere.

Here's the video, it's nearly 40 minutes of quadcopter footage of the event.  The noise from the copter might be a little annoying, fair warning. Those later castle battle are pretty insane and worth a watch, especially with destructible haybale walls. However, I really only want to look at the first battle for this post.  I chose this first fight to look at because it illustrates how important maneuvering can be.  If someone wants me to look at other fights or videos, I'd be more than happy to later.

 
For starters, our friend from Europe and his group are among the black/purple clad group at the center, we'll call their team the good guys.  The green group to their left appears to leave an intentional gap, I suppose as a trap or some variant of a kill pocket (the blue area marked below).  The right flank has pushed forward aggressively, just out of frame in this first picture.  We can see a gap, marked with yellow start to appear even this early in the fight.
 
Maneuver Phase of the battle.  Blue=intentional? gap.  Yellow=Gap to watch later


Other keys to this part in the battle are how the enemy forces are arrayed. Directly ahead of their middle, the good guys are up against a high (insanely high compared to Belegarth) concentration of spears.  They've already grouped up and have no signs of changing course.  The enemy line is already curving away, bowing out towards our friends.  This makes the entire field a scaled up version of a kill pocket.
 
Stalemate Phase of battle.  Even the spears are mostly at max range. 
The enemy has cut off the flanking group, but haven't fixed that gap yet.

 
Once the lines are close enough to engage, we reach the stalemate phase.  At this point one would expect that our little yellow gap here would have been closed up, but groups maneuvered away from it to engage our friendly flanking groups.  The enemy black/yellow group pushed out to engage, leaving only a few skirmishers to cover the area.  We can also see that the friendly lines haven't engaged the outside corner at all, leaving a large chunk of forces to the right flank of the black/purple group essentially in reserve.


The moment when decisive action could be taking place. 
Easily could have happened sooner than it did in the video.
Black lines are what I would have my line do at this point.
A closer look at the gap.  The group friendlies directly across from
it eventually push through.


This all sounds like a huge advantage for the friendlies, and it is.  However, there are few things that could have helped our purple/black friends survive the encounter a little better.  At the point pictured above, we see that gap still lingering around unopposed.  We also see our purple/black friends keep a solid line in the face of that giant mess of spears (highlighted in red).  The problem here is that holding their ground actually costs them a lot of casualties as we'll see when the copter makes another pass later.  The black lines here are what might have helped them get through this mess with a few more fighters intact.  Rather than standing strong against the concentrated spears, the line should have spread out (towards the right flank) while forming a kill pocket (the curve back marked here). 

By shifting forces to the right of the main enemy strength, it reinforces the group that should have already been pushing that gap.  By spreading out and backing away, it forces the enemy formation to spread their offense in different directions, preventing a whole group of fighters from being lost quickly.  Those directly opposed to the spears need to fight purely defensive and let the enemy advance.  Their whole goal is to buy time for flankers flooding through the gap to win the day.

When we see the camera come back to this section, we see that the group along the right flank that was engaged with the enemy black/yellow group joined with a few of the friendly corner group to push the gap (finally), but by time this happens our black/purple friends have been cut to shreds.  This makes the clean up much more difficult later.

The moral of the story: engaging a spear formation head on is rarely the best course of action. Making use of defensive maneuvering can both save lives and set up your enemy for being flanked.  Keeping an eye out for gaps early in the fight can give you some idea of where they will be later.  This particular case shows that they often form between two groups of fighters that are good at maintaining their own coherency. Because groups/units don't usually share leadership, you'll find groups can often lose track of their support unless their own anchors are doing a great job of keeping the whole line together. Creating/attacking/exploiting these gaps can be crucial to killing enemy formations and skilled groups.

In my next post, I'll take a look at some strategies for taking down spear formations.  It's a lot to cover, so I didn't want to include it all here. 

Tuesday, January 13, 2015

Small Unit Tactics


Not all groups enjoy the thick fighting at the center of a solid line.  Others lack the experience, numbers, or equipment to do so successfully. These groups often suffer at larger events, where the lines are densely packed.  Skirmish tactics work a little differently when facing such lines, as opposed to the more open fields of their home practices. A skirmishing group needs to capitalize on their best asset: maneuverability.

A skirmish line will quickly be picked apart should they face a group of experienced line fighters directly, especially if numbers aren't in their favor. However, this doesn't mean skirmish lines are incapable of winning the fight.  It takes a different approach for them to succeed.  Rather than attempting to rush into a line fight, the skirmishers need to fight the front of the line on the defensive. Their main goal has to be survival, only taking advantage of a few kills as opportunity presents them. By keeping mobile, they might be able to get the enemy to spread out or lose track of a few of the skirmishers. By drawing the enemy directly ahead, a few people on the wings might be able to flank around the enemy.

While most people "flank" by merely running past the ends of the lines until they are far enough to get around unopposed, a little more teamwork and tactics can make flanking a much stronger, faster tactic.  It is best to work in groups. Pairs work fine, but larger groups have more options.  Each group must set for itself a goal of delivering one fighter (or small group of fighters) the enemy's back.  This mindset allows flankers to function much closer to the core of the fight and still get someone behind the lines unopposed.  As an added bonus, some of these tactics also apply to heavy line fighting for shock troops, which could help a group transition to that style of fighting later. 

Let's look at a few specific strategies. 
 

Pin and split

Pin and split is my generic term for a great move that you can accomplish when, as a flanker, you outnumber the enemy that is in your way.  At its most basic, a 2v1 situation, one person engages the enemy, allowing the other to slip by unopposed.  Regardless of how well the pin survives, they buy their teammate plenty of time to cause havoc.  This strategy also works well for exploiting the edges of a gap in the enemy line. 


A larger group of fighters can enact this strategy well, even doing so multiple times as new threats approach.  Each time an enemy turns to counter them, the minimum number of flankers peel off to pin them as the rest continue flanking.  Remember, the goal is always to get at least one fighter to the rear of the enemy's main line.

Another extremely effective way to use this strategy is to counter flankers.  If your own team's flankers have become bogged down on the flank, fighting a line battle, the two fighters nearest them could try to pin/split against the enemy anchor.  The second closest to the end engages the enemy anchor heavily, probably fighting a 2v1 on the enemy flank.  The friendly anchor is then free to backstab the enemy flankers, freeing up a large force.  This is an exploit of the gap between the enemy line and their flankers, but could be used against almost any gap.


Wolfpacking 

When outnumbered, but not outmaneuvered, a team can attempt to split up.  By being more mobile than the larger force, their goal is to survive and pick apart any stragglers they can until the smaller force has a decisive advantage.  The skirmishing team still needs a few people to take the enemy head on.  When the enemy advances, the line spreads thin, leaving just a few fighters to keep the attention of the enemy core.  The rest flank around, using strategies like the pin and split. 
 

However, because the skirmishers are outnumbered, getting into the enemy backfield alive is going to be difficult, if not impossible, until several enemies are dispatched.  If the skirmishers can manage to  get their flankers to meet up behind the enemy (turning the line into a circle), they are now free to run in opposite directions.  At this point, the skirmishers must work off of each other.  By running in opposite directions, vision gaps will eventually be created that allow one of them to pick off an unsuspecting enemy.


A large part of the strategy requires that each skirmisher acts as a distraction first, staying alive as best they can.  Then, only take shots that are nearly guaranteed hits.  Kills are preferable, but legs will help reduce the enemy's ability to maneuver against you and arms will help soften them up for future attacks.
 

Pairs

Small groups should learn to work in pairs when possible. The goal is to develop tactics that work well when targets are isolated, while maintaining some safety in numbers. While you won't always be able to make a 2v1 situation happen, you want to be able to win the fight without losing much of your capability. 

You may find 2v1 drills particularly useful.  It helps build teamwork for the pair and helps the solo fighter practice for being outnumbered.  The pair has a goal of killing the solo without either of them being hit, while the solo tries to land a single hit on the pair.  Alternatively, you could have the solo fighter try to stay alive for a set amount of time or number of swings. This can help them prepare to be a pin or to keep the core of the line busy for a wolf pack strategy. 

One strategy for a pair is to plan, in advance, where to swing.  For example, one will swing high to the sword arm, while the other swings low to the shield side hip.  This forces the enemy on the defensive, because their shield will usually not be able to cover both angles, forcing them to block with their sword or die quickly.  Following up with a couple of swings will likely kill the target, as long as both keep the pressure on them. 

When the pair is on the defensive, it becomes important to not only block for your partner, but lure enemy targets out for them.  You can fake swings to try to get the opponent to counter, leaving their arm open to your partner.  Placing swings to one side of their shield or guard might draw their defenses over, letting your partner attack the other side. 

Against a solo opponent, the pair needs to move such that both can swing at the target or so that neither can be hit easily. The most favorable positions for the pair are either with the solo fighter facing the gap between the them, or with the pair slightly offset towards the solo's sword side.  This allows both to swing, and the latter gives a great angle against their weapon arm. 


"Good" in this case, relative to the pair. 
 
On the flip side, the solo fighters will need to use solid footwork and sword blocks/parries to stay alive. Most of their footwork will have them backing up, often to an angle.  Against a pair, their goal is to isolate one of them by stepping away from the other.  His preferred positions are either lined up against his sword side opponent (so his shield blocks off the other well), or with one enemy blocking off the other's angle of attack.  The second one is harder to pull off, but is the safest.
 

Communication 

I can never seem to stress this enough, but communication is vital to success as a small force.  Even without a command structure or leader, the group needs to all be aware of the overall plan.  Without communication, strategies like wolfpacking can quickly fall apart into chaos. 

Experienced vets may be less verbal, relying on their combined experience and reacting to the situation as best they can.  However, even vets will make sure to communicate openings they see or dangers around them. Starting out, simple communications like when to move or change spacing are necessary (vets usually adapt to the space well, without needing specific commands for it). One thing all groups need is a direction or target, and communicating that goal, or changes to it, should be a priority. 

Call out dangers to your line.  Call out targets, gaps, and weak points in the enemy line.  Equally important, relay calls from others.  For example, if you line needs to shift right, and you hear someone call it out, then you should repeat it down the line. Warn your allies of arrows about to be loosed, javelins at the ready, or support weapons taking notice of their flank. It is a lot to keep your mind on, but the more of these things you can keep your team informed about, the more successful they will be.
 

Leadership ("Driving the bus") 

Smaller groups sometimes lack any sort of command structure.  Even large realms have many people that could take charge, but no clear, default leader. That doesn't mean they lack leadership. In these groups, individuals usually take charge of the area around them as needed. Groups of veterans often have a very decentralized form of command, especially during a protracted line battle where individuals manage their own area. Those with the best line of sight, or that notice problems sooner, often begin taking charge of the few people around them. 

If someone else is issuing orders, do your best to support them.  Note, I didn't say "blindly follow a terrible plan".  Support the plan by maneuvering yourself and others in a way to help the plan succeed.  This might mean moving to cover a gap that no one else saw or being aggressive to draw the enemy's attention. Sometimes it means doing something that is opposed to the orders, such as taking a run through a gap rather than standing your ground.  The overall idea is to make the group more successful at its current mission. 

If no one is taking charge or communicating, take command and do your best to help the team.  Even a bad plan is usually going to be better than no plan. When it comes to actually taking charge of the group, do your best to navigate the group into favorable fights.  Try to issue orders that make sense for who you are ordering around, ie. don't have the 300 lb guy in full armor and a tower shield flank.  Play to your group's strengths.  More armored up fighters will need to form up against the bulk of the enemy, while faster fighters need to maneuver around. Try to engage targets such that your backfield is relatively safe (not facing the majority of the enemy groups). 

Most of the fight relies on your individuals finding success, but issuing commands to regroup or shift the line can give those individuals a better chance to survive.  Your goal, as leader, is to maintain the line during a fight.  Watch for gaps and weak points in both lines and move your forces to exploit or counter them.  Learn to spot vision gaps, especially along the enemy flank.  If their anchors aren't paying attention or are drawn into a fight, deploy a few flankers around them.  If your flankers need a better angle, shift the line to present the enemy's back to them. 

"Driving" isn't easy, even in a small, skilled group. Don't be discouraged by a bad fight or if you think you may have made a bad call.  Learn from the strategic failures and try to fix any issues with communication within the group. You'll get a chance to redeem yourself next fight. 

One side note, when a small group is part of a large team, they should do their best to integrate with the group.  Issue commands not only to your group, but those around you that lack leadership.  This is a great opportunity for smaller groups to get a better feel for line fighting, and working with support weapons.  Also, don't hesitate following orders from outsiders in this scenario, especially ones that seem to know what they are doing.
 

This section probably could be its own post.  I might try to put together a more detailed version, perhaps as a post-mortem next time I drive the BOF bus.

Wednesday, January 7, 2015

A Squire's Path

While I have discussed knights and squires in the past, I've had a few people ask for a few more specifics about the squiring process.  Newer realms that aren't next door to an established order of knights often seek to start their own order, but several of them will hesitate because they haven't been around the traditions enough to really understand the process. This post's goal, then, is to share my view of how squiring works in a well-established order of knights.

My home realm has many knights, several of which have held their title longer than Belegarth has been its own sport. That isn't exactly common, but many realms have such experience, with or without the title.  Knights here are allowed one squire, and a second if they call and pass a vote to allow it. With so many knights, that means there can be many people going through the squiring process at any given time.  They only true requirement for them to get knighted is to earn enough votes from the council of knights. 

I say that's the only true requirement, but the rest of the requirements come from their knight, and the standards the other knights will use to decide how to vote.  The realm's general requirement is that each squire must beat all of the active knights in challenges, set by the knights.  These can be duels, field challenges, or non-fighting displays of skill or knowledge.  Many knights gauge their squire against Kyrian's list of squire tasks, as it encompasses nearly every type of task one could give a squire. Once a knight feels their squire has completed their tasks, they will bring them up for a vote to be knighted. 

The knight and squire relationship is important to the process.  In addition to their direct training, knights apply their experience to guiding their squire through the process.  Occasionally, this can be harsh truths, comforting words, or a kick in the right direction.  They help keep the squire on task and motivated to finish challenges and tasks.  They also need to point out weaknesses that need improved and extra tasks (like running a specific event).   The main thing the squire needs is a little bit of help outlining what they need to work on and where they stand. Some of this could be done by a realm taking on a squire in lieu of a knight.  Those realm squires, without a knight, do miss out on a little bit of the fun part of squiring--fighting alongside their knight. 

One misconception that seems to be common is that a squire learns everything from their knight.  While a knight teaches their squire many things, a great deal of learning comes from others.  Squires must be on a quest to learn from as many people as possible, while doing their best to think critically of their own techniques. A lot of skill develops from self-evaluation and adapting to overcome skilled opponents.  By challenging the best fighters and seeking their criticism, one can often find what needs to improve, but it takes concentrated effort to actually fix technique. This also applies to service, as most knights have much experience in planning and running events, and can be great at recruitment and retention. Even in areas that have few knights (or those of equivalent experience), a realm might be able to pass along its shared experience and knowledge to a squire who seeks to learn all their area has to offer.  However, one may need to venture beyond their realm to gain more specific knowledge that elder realms/knights might be able to offer. 

As a squire, I always set for myself the goal to "do what a knight should do".  That means a lot of different things to each person, but gives one a guideline to follow.  If there is a gap in knowledge or skill that prevents achieving that goal, then obviously that is something that needs to be worked on and improved.  It also frames the mindset of service, as in if I would complain that a knight should be doing a task, why wouldn't I just take care of it? Of course, this also requires an idea of what knights do, or to have knights to emulate. 

The answer to the problem is complicated, as each knight brings something different to the table.  There are some that make a distinction between "fighting knights" and "service knight". All knights should be both, to varying degrees.  Fighting skill (or knowledge of fighting technique) is important for building a stronger realm and can be a great way to bolster recruitment through displays of top skill.  Service is a broad category, but even knights that focus on fighting still serve the realm through teaching.  It is also helpful for event planners to have fighting experience so they can plan fighting that keeps attendees involved and entertained.  The point here is that both sides bolster each other, and it is important to develop in both areas. 

One aspect of fighting skill that is often overlooked in discussion of squire tasks is field leadership. Taking command and helping the group find success on a large field is something knights should be doing (see above). Many knights have their squires read classic books on military strategy (Art of War, etc) to help build this sort of strategic mindset. Often, squires will be tasked to lead realm battles or shepherd a flock of new fighters to test their leadership.  Developing a keen eye for the flow of a line fight and gaps in the enemy line not only boosts their ability to personally influence the fight, but also to lead others to the same ends.  Smaller groups/realms might find that having a reliable commander might make the experience at major events more fun as they find more success on the field. 

Knights don't have to be the best one on one fighters in every style. However, they do need to be well versed in a variety of weapons and techniques.  Most knights end up specializing in a few weapons or styles, and are often experts in one or two.  I would say "mastered" one or two styles, but I have always felt that there will always be room to improve. At the end of a squire's path to knighthood, they should be able to display a high level of skill in a couple of styles.  Even being an expert in a support weapon should qualify. Controversial as it may be, even a non-combatant might be able to display fighting knowledge that rivals even veteran fighters--leaving the path of non-com squire open to those realms that would find it fitting.  To fit the mold of "someone that could run a realm", a knight needs to be able to teach fighting technique, not necessarily excel at it.  For example, I'm no expert on flails or bows, but I could teach someone how to use them effectively.  
 
All squires should be experts on the Book of War (and/or Dag's Manual of Arms). And by expert, I do mean expert.  They will need to know the rules for combat to be a herald, and the rules for weapon construction to check weapons and to build them. Even someone that has been in the sport for a while should review the rules and study them a little bit periodically, especially if one plans to work towards knighthood.  The hard part for newer realms, or those farther from the traditions, is that it is difficult to learn unwritten rules and old combat conventions without exposure to long serving veteran fighters. This is where disparity appears between realms and regions, especially in realms that rarely make it to large events.  Knights pass along this tradition to their realms.  Squires in more isolated realms should make it a point to visit older realms and learn from elder knights. 
 
Squires/knights should do their best to be paragon of sportsmanship and a good representative of the sport. They need to be an example to others of how great fighting can be.  By having fun, fighting hard, and coming away from a fight with a positive attitude, they can help make a mediocre day of fighting into a great time for everyone on the field.   From a recruiting standpoint, they need to be able to talk to newcomers, teach them the basics, and get them fighting.  They should be approachable and helpful.  Consider who recruited you to the sport, who really sold you on sticking around, and do your best to emulate them.

The benchmark for when a squire is ready to be knighted should be high.  The process should be hard enough to forge a strong fighter and realm leader. It should last long enough to give a squire opportunity for growth and success, as well as a chance to fail and recover, but each one's path is different and takes its own time to complete.  There should be no rush to be knighted, for the more difficult and time consuming the challenge, the more rewarding the title will be.
 
A bit of a side note.  Several people concern themselves with the prestige or reputation of the title "knight". While it is something that many people honor, the meaning of the title rests in the hands of those who have earned it.  Anyone can call themselves a knight, but those that have earned the respect of the knights they have aspired to be will find their title much more meaningful.  The title is more that you have been accepted to join them as a peer of the order.  For those knighted under realms, it is a mark of that realm's respect and appreciation for your efforts. As long as a knight upholds the goals and aims of his realm, there is little reason to concern themselves with what outsiders think about the title.